Tuesday, March 30, 2010

A Day Amongst the Daffodils


Today I went to the Tulip Festival! I wore my daffodil headband, and I made my mom this little daffodil pin to wear. Needless to say, we were very well dressed for the occasion.


A few of the beautiful bouquets I brought home.


Pretty much anywhere I go in my house right now there's a little tulip or daffodil bouquet. I love this time of year!

Monday, March 29, 2010

Sunny Daffodil Headband Fascinator


It's Spring Break, which means one very important thing to me: it's Tulip Festival time! Despite my decidedly brown thumb, I love going to the Tulip Festival every year and coming home with buckets full of cut and potted daffodils and tulips. The potted ones don't last long, but they're pretty while they do!

Anyway, tomorrow is the big day, and I just happened to have seen this fabulous tutorial on A Hoot and a Holler* for felt daffodils. I turned mine into a headband fascinator. Here's how you can make your own!
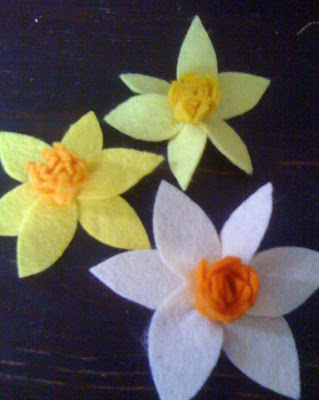


First, use the tutorial to make three daffodils. Mine are about 2.5" wide. I used three different color-combos, representing my favorite Washington varieties!

Next, use a store-bought headband for a base. I had one that had a strip of black velvet on the underside to create a no-slip zone. I peeled this off before I started and set it aside:
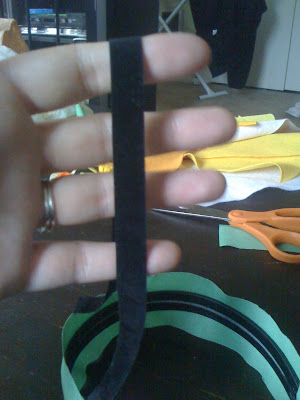


Working a few inches at a time, hot-glue a strip of green fabric to your headband. You want to center the fabric strip on the top side.

I used a strip of fabric that was a little more than twice the width of the headband, and about 2 inches longer.
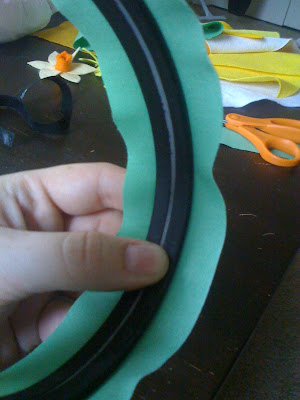


Fold each fabric end up and glue to the underside of the headband:


Fold the fabric under on both edges. Work one side at a time, a few inches at a time. Don't go overboard on the hot glue, or you'll get unsightly lumps. Try to keep everything smooth like Shaft.
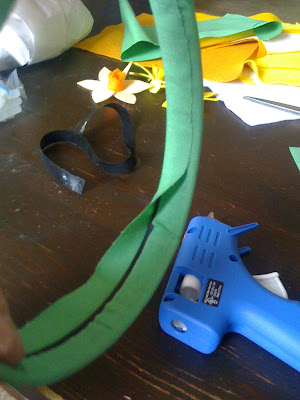


Once everything is glued down nice and smooth, glue the velvet strip you set aside earlier back onto the underside of the headband. It'll cover up the seams and make this a no-slip headband:


Last, hot glue the three daffodils into position. I had to keep checking the position in the mirror to get them just right.


Hooray! Daffodils I can't kill!


*By the way, I have a couple of shout-outs for A Hoot and A Holler. First, can I just say that the owl on your blog banner is killing me?? It's so cute I want to get it tattooed on my hand so I can look at it all day. Second, I always admire a fellow blurry-photo blogger. Even your blurry pics are infinitely prettier than mine, but nonetheless I like seeing the blur boldly posted! I think we should start a blurry photo movement... they're artsy! Yeah, that's the ticket...

Friday, March 26, 2010

Crafty Cocktail Rings


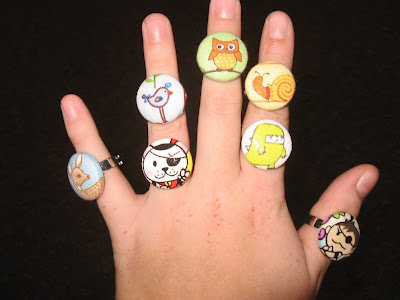
Here's a quick and silly project that I had lots of fun with last night!

These are just fabric-covered buttons I made with some of my favorite fabric prints. If you've never made fabric-covered buttons before, go out and do it now. You can find all the supplies you need for cheap at a fabric store. It is so fun and easy and addictive.

After I made the buttons, I pulled off the little loop at the back of the button where you would normally sew the button on. This is just a bent piece of wire that is easily popped out with pliers.

Last, I hot-glued the buttons onto some adjustable ring blanks I bought on Etsy. Finding the ring blanks was the hardest part - Michaels totally let me down. Thank goodness for Etsy.

So I went a little crazy and made 10 of these happy little cocktail rings. My favorite is the pirate cat - it's from the Tokidoki-esque fabric I used on my sleep shorts last winter.


I have no idea what to do with these now. If you're a friend who reads my blog and you want one, just let me know and it's yours! :)

Sunday, March 21, 2010

Sewing Table Reclamation (part two)

When we last saw our brave-but-clueless heroine, she had just purchased a ganky old desk from Goodwill on a whim. She decided not to let her lack of experience or general know-how stop her from transforming the desk into the perfect sewing table. In our last installment, she had just finished priming the table.

Next went on two coats of a beautiful, creamy gray paint.


I wanted the inside of the drawer to be a little pop of color, so I gave it a couple of coats of the same orange-sherbet that I painted my bedroom.


My last step was to toss the ugly old wooden drawer pulls it came with and replace them with these gorgeous glass ones from Anthropologie:


And... voila! My perfect new sewing table. Now we can have our dining room table back!


What's my next step you ask? Repainting and repurposing our office to become a sewing room befitting this sewing table. Here's my inspiration, the gorgeous sewing room of Laura Gunn of Paint in My Hair:


...drool...


...Aaaaand here's what I'm starting with (sorry for the blur... maybe you're better off not being able to see this room clearly):


Don't judge me.

Sewing Table Reclamation! (part one)

Oh man... the dangers of being impulsive and having no concept of my own limits...

Sunday morning I got a wild hair and headed out to Value Village early. I was kind of tickled that because of daylight savings they were opening (what felt to me like) a hour early. Turns out that opening time is also when all the oddballs show up... like the creepy old man buying three music boxes and a volleyball, "for his girlfriend."

Anyway, I almost overlooked this desk, hiding as it was behind two metal filing cabinets and a cd tower:


Now, this photo actually camouflages the damage done to the desk, but wow - look at that potential! I just loved the shape and size. The finish was shot, and there were some beautifully tragic painted flowers that someone had apparently tried to gouge out with a butter knife, but there were no major knicks and the whole thing was sturdy.

It was $20 (pretty steep for a Value Village!), but I had a 20% off coupon from donating items that I used, and the cashier let me layer that on top of the 40% off yellow tag sale they were doing.


The weird thing was, I knew right away what I would do with it. After a quick stop at the hardware store, I got busy. First, two coats of primer. Can I just say that I love primer with stainblockers? It meant that I didn't need to sand or strip or do a darn thing before priming! Woot!


To be continued...

Thursday, March 18, 2010

Yum Yum Spring Sprout Cake


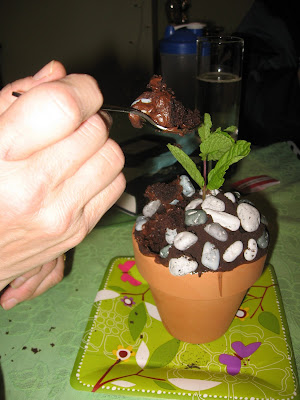
Yesterday was my Mom's birthday (Happy Birthday Mom!). She's about the most passionate gardener I know, so I just knew I wanted to throw her a spring/garden party. The centerpiece were these potted chocolate cakes. Yes, those are cakes! If you want to make your own, here's the how-to:


Here's what you'll need:

-Boxed chocolate cake mix (or you could be fancy and make from scratch)

-Chocolate frosting

-Chocolate dirt (I got mine from a cake supply store), or crushed oreos

-Chocolate rocks (again, cake supply store)

-Mint sprigs

-4 new terra-cotta pots, washed thoroughly

-aluminum foil


Start by making your cake batter:

To prepare the pots, first line each one carefully with aluminum foil. You want to press the foil all the way down into the pot, and make sure it comes all the way up the sides. This is kind of tricky, because the foil wants to rip. I discovered it worked best to make a sort of foil torpedo, then shove that down into the pot and smooth up the sides.


You don't want any foil showing, so now tear off the extra foil that hangs out the top:


Fill the pots about 2/3 of the way full with chocolate cake batter. You won't use all the batter, so I guess I could have made 5 cakes.

Put the pots onto a cookie sheet and bake according to your box directions (or recipe, whatever). Keep an eye on the time though - mine took about 35 minutes, but I kept checking because I wasn't sure what the terra cotta pots would do to the bake time.
While I waited, I decorated the table all spring-like:
When the cakes come out of the oven, let them cool thoroughly.
To decorate, first frost with the chocolate frosting, then sprinkle with your chocolate/Oreo "dirt." Adorn with chocolate rocks, and stick a healthy-looking mint sprig in the top.
Dig in! The best part is, there's a built-in party favor here: your guests get to take home terra cotta pots ready for spring planting when they finish their cake! By the way, the portions are kind of huge, so you could also plan to share each sprout cake.
This recipe compliments a glass of champagne nicely. Happy Spring!

Sunday, March 14, 2010

Baby Quilt Completed

Sunday I finished the baby quilt I've been working on. Remember all my little sandwiches? Well, the next step was to stitch an X through each one, like so:


Now all my little sandwiches would hold together!


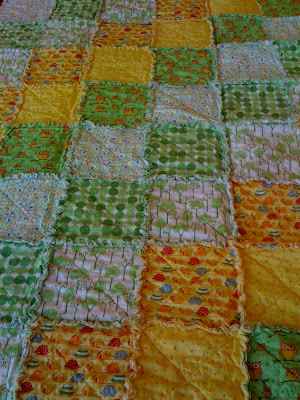
Then, I stitched all the sandwiches into strips, then stitched the strips together. I used a half-inch seam allowance, and just let the seams stick out on the back. Here's what the front looked like:


Here's the back:


After topstitching a half-inch border around the whole thing, I started to fringe all of those seams sticking out:


I fringed all the seams in the quilt as well. My hand is so mad at me after all those little cuts! I found hand muscles I didn't know I had.

The last step was to throw the quilt in the wash on a gentle cycle with Woolite, then put it in the dryer. The idea here was to fluff up all of those seams that I fringed. I pulled this little friend out of the lint tray when I was done:


Here's what it looked like when it was all done!


Here's a weird aside:

I started this quilt on a total impulse. I have no kids, and I didn't have anyone in mind to give this to. I just really liked the fabrics and the idea of making a quilt. This alone was strange, because I have had exactly zero interest in quilting my whole life, and now suddenly I must make this quilt?

Anyway, I started it on March 7th. March 10th I learned that a teacher at my school had adopted a baby - she and her husband had been trying to adopt, and the whole thing came together in three days. The baby was a little boy, and he was born on March 7th - the day I started the quilt.

Maybe I'm reading too much into this, but I just feel so strongly that this quilt was meant for this little baby, and it is en route to him as we speak. Obviously, no one threw the parents a baby shower before his arrival, so I don't know how many items like this the baby has right now. The fact that I started a baby boy's quilt with no idea why and then this all just sort of fell into place... well. I happen to think that's pretty darn cool!

Why Should Girl Scouts Have All the Fun?


I had so much fun making my Lucky Merit Badges last week that I decided to go ahead and make some non-holiday-related merit badges for a friend. Let's see if anyone can guess who these are for!


This is the DSLR Merit Badge, awarded to her because she has totally taught herself to take beautiful photos in only a few months! It is also, incidentally, a persistence award. You see, every time she goes anywhere, she takes her camera and shoots pictures. Her husband finds this very annoying and tries to stop her. But she doesn't, and I'm glad! I like seeing her pics.


This is the Creepy Halloween Cupcakes award. Last Halloween this friend and I made goodies for our staff lounge at work. She found so many cute and creepy ideas for baked goods, and we had a blast! The most memorable were some eyeball cupcakes we made. They looked like this:

These are not our cupcakes, although ours did look just like these. Photo courtesy of Samantha's Sweet Treats.


Finally, here is the Yellow House Merit Badge. Given not only to a person who has worked tirelessly to turn a charming house into a ridiculously-charming house, but also to the person who writes one of my favorite blogs, In a Yellow House.
Okay, have you guessed yet?
If you want to make your own merit badges, just follow the tutorial linked in my Lucky Merit Badges post, but instead of stitching on the clover use fabric glue to attach whatever you want. I used fabric glue instead of stitching on these because I had so many very small pieces I wanted to add in felt, like the chimney on the yellow house.

Saturday, March 13, 2010

New Daylight Savings Time... New Blog Look!

I didn't really change my blog look because of daylight savings. I just was tired of the buttons on the old format getting in the way of the posts, so I was ready for a change!

It's been quite a process today. I got up early this morning with a bee in my bonnet about my blog layout. I started out by using Kevin and Amanda's very clear tutorial on creating your own scrapbook layout. I just never really like the pre-made freebie layouts... lots of shabby chic and distressed ribbon. Which is fine, but not my style. I made this:
Which I still like okay, but when I went to apply it to the blog the owls lost a lot of resolution and the yellow field wasn't quite the right size. Oh well, back to the drawing board!
I spent another couple of hours flipping through more free sites, and saw a lot of shabby chic spring-themed options.
Finally, I headed to trusty old Etsy, and found Keshia of Urban Design Studio 1, who set me up with the super cute Anthropologie-inspired theme you now see here.
Ahhh... the satisfaction of getting what you wanted after a long day of frustration!

Behind the Blog: The Making of the 3 Bears


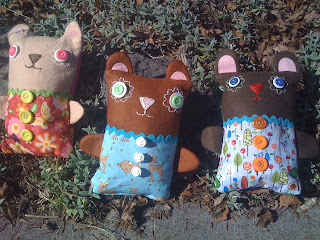
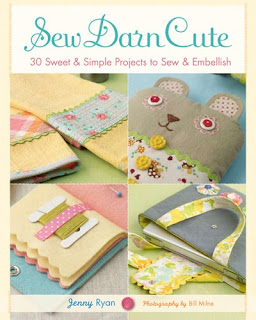
Last weekend I dropped all 3 of my lovely little bears. Now, you should know that the idea and directions for these adorable bears came from the wonderful book, Sew Darn Cute:


You should go out and buy this book, right now! It is full of adorable, crafty inspiration. The first project I did was the Square Bear. I modified the cut measurements a little because I wanted to use up some felt scraps. Because I was using scraps, I made the back of each bear a complimenting color, and the front a color that a real bear could reasonably be. For example, Mama Bear is brown on front, and pink on back.


I also had to make my bears legless, because I didn't have enough felt.


Here are the bears starting to take shape. You can see that I needed to trim the bodies down, or these would have been some big fat bears!


I also loved getting to pick out buttons for the faces and bodies. I might have bought slightly more than I really needed for this project. Oh well, there will be other projects...